Google Workspace
How to connect Google Workspace to Cork
Generating API Key
- Log into the Google Cloud Platform console ( https://console.cloud.google.com/ ) with an account that has super administrator privileges in the Google Workspace organization that you want to connect to Cork Protection
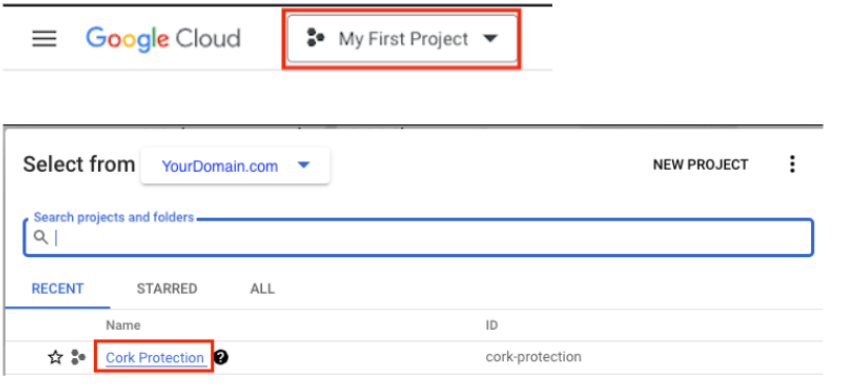
- Click the Project Dropdown in the upper left hand corner of the screen (next to the hamburger menu and Google Cloud logo)

- In the window that pops up, verify that the Google Workspace organization that you want to connect to Cork Protection is selected in the “Select from” dropdown. Once confirmed click New Project.

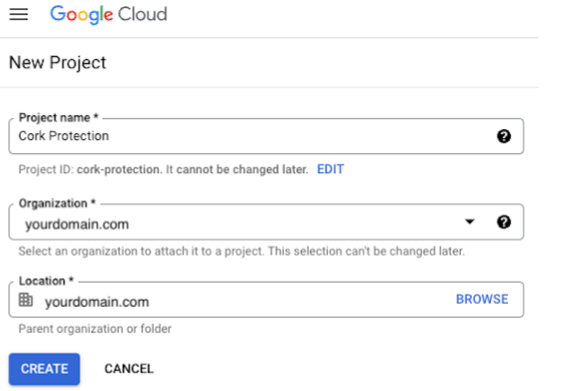
- On the New Project screen, fill out the project details and then click Create.
-
- Project Name: Cork Protection
- Organization: Parent organization
- Location: Parent organization location
-
- Once the project finishes being created, click the Project dropdown and select the newly created Cork Protection project.
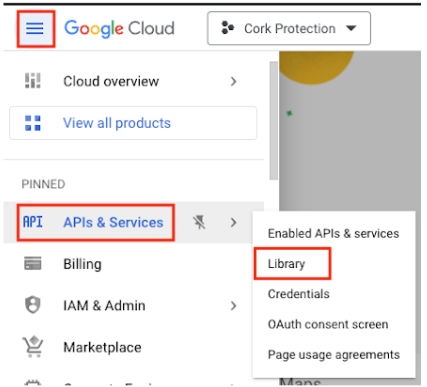
- Click the hamburger menu in the top left corner to open up the navigation menu. Select APIs & Services > Library
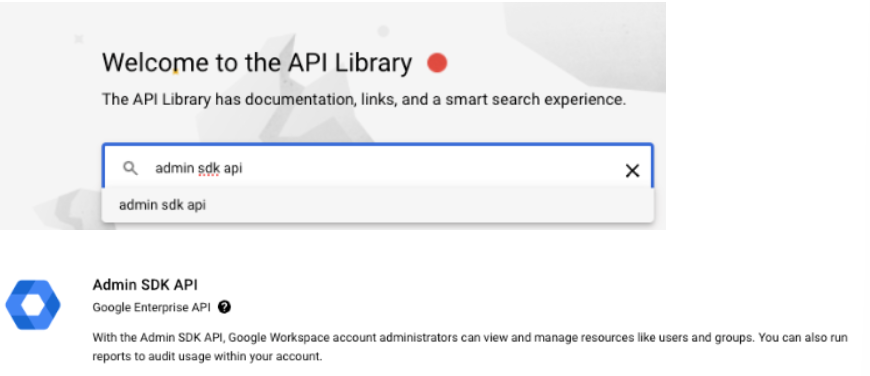
- Using the API Library search bar, search for admin sdk spi, and in the results, select the Admin SDK Api
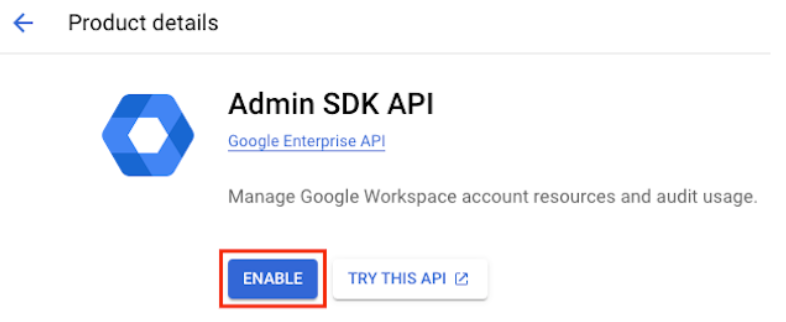
- On the Product details page, click the ENABLE button to enable the Admin SDK API.
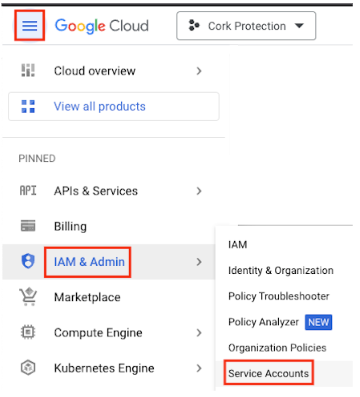
- Open the navigation menu with the hamburger menu and navigate to IAM & Admin > Service Accounts
- On the Service Accounts screen, click the CREATE SERVICE ACCOUNT button

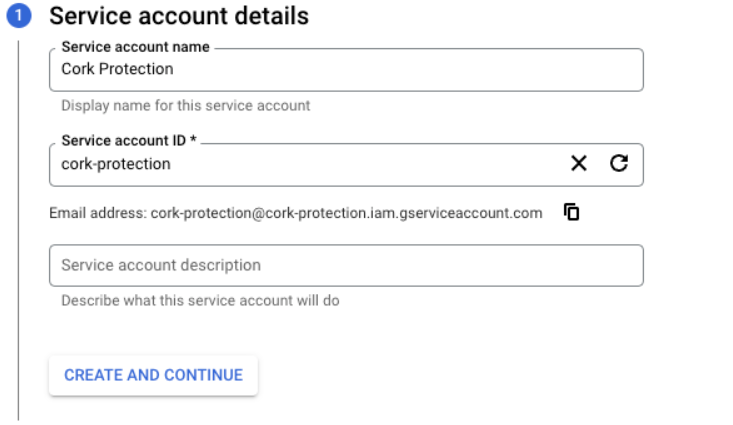
- On the Create service account screen, complete the Service account details and then click the CREATE AND CONTINUE button.
-
- Service account name: Cork Protection
- Service account ID : (auto-filled)
- Service account description: <fill in a description if desired>
-
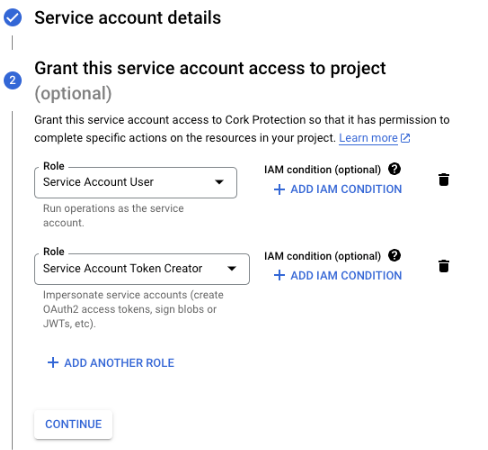
- For the Grant this service account access to project (optional), grant the following IAM roles to your service account using the select a role drop-down menu, and then click the CONTINUE button.
-
- Service Account User
- Service Account Token Creator
-
- Nothing needs to be done on Step 3: Grant users access to this service account (optional). You can press the DONE button to skip this step and complete the service account creation process.
- After pressing done, you should land on the Service accounts screen. There you will see your newly created Cork Protection service account. Click the Actions icon and select Manage Keys

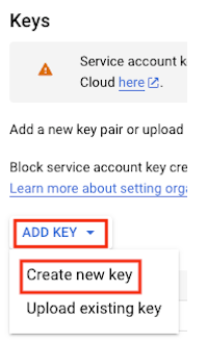
- On the Keys page, click the ADD KEY dropdown and select Create new key.
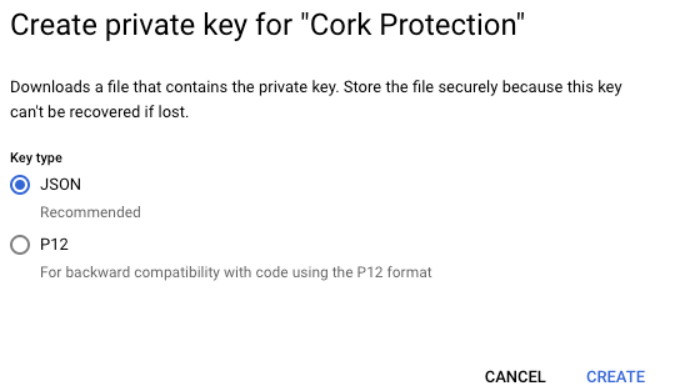
- On the private key creation screen select JSON and then click the CREATE button.
note: You may encounter the errorKey creation is not allowed on this service accountwhen creating the service account key. This is related to the organization policy constraintiam.disableServiceAccountKeyCreationbeing enforced in your organization.
To resolve this, select the main organization from the project picker and then assign the Organization Rolicy Administrator role to it's service account.
Then, select the newly created Cork Protection project from the project picker, Navigate to the IAM & Admin > Organization policies, enter Disable service account key creation in the Filter field of the table and then select the entry corresponding to the constraint ID provided from the error, which will navigate you to the Policy details page. From here, click MANAGE POLICY, select Override parent's policy, ADD A RULE, set Enforcement to off, and then SET POLICY to apply. Now after Google has propogated these changes in the environment (1-5 minutes), you should be able to retry this step again.
- On the private key creation screen select JSON and then click the CREATE button.
- You will be prompted to download the private key. Save this to a secure location. The contents of this key will be needed in later steps.

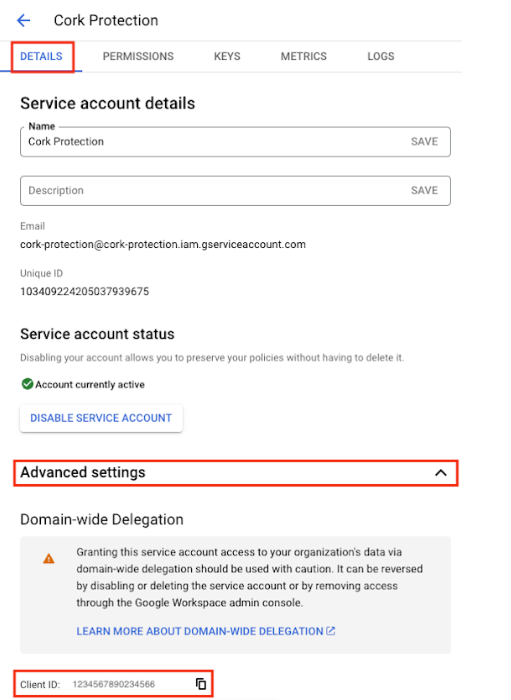
- While still on the Cork Protection Service account screen, click to the DETAILS tab using the top navigation bar. Once there, expand the Advanced settings section. Copy the Client ID to your clipboard or a temporary location as it will be needed in a later step.
- In either the same or new browser, log into the Google Admin Portal ( https://admin.google.com )
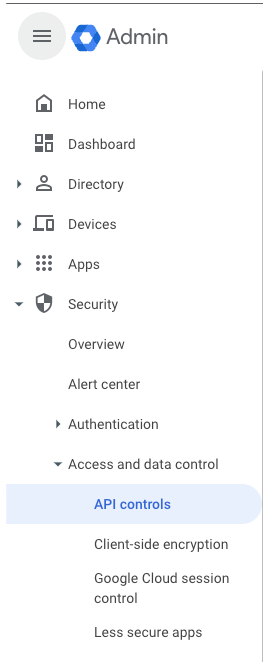
- In the left hand navigation menu navigate to Security > Access and data control > API controls.
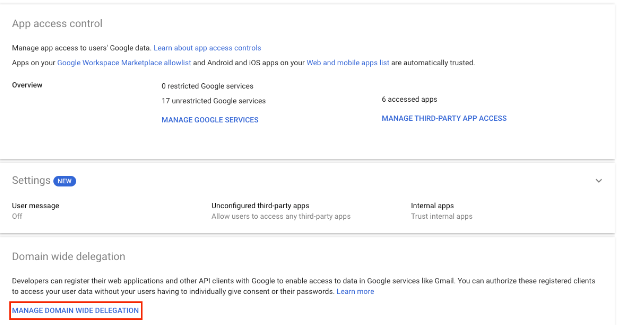
- Click MANAGE DOMAIN WIDE DELEGATION
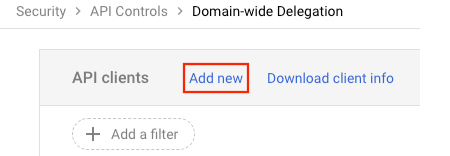
- On the next page, click Add new on the API clients table.
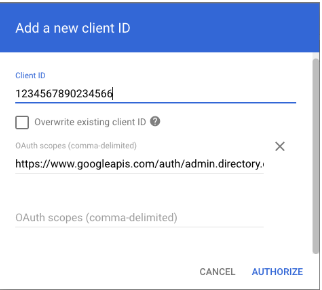
- Paste the previously copied Client ID into the Client ID field, enter the following OAuth scopes, and then click AUTHORIZE. Note: If the Client ID is no longer on your clipboard, you can navigate back to the previous page, or you can open the previously downloaded private key file in notepad and locate the client id there.
-
-
- OAuth Scopes:
- https://www.googleapis.com/auth/admin.directory.domain.readonly,https://www.googleapis.com/auth/admin.directory.user.readonly,https://www.googleapis.com/auth/admin.directory.customer.readonly,https://www.googleapis.com/auth/admin.directory.group.readonly
- https://www.googleapis.com/auth/admin.directory.domain.readonly,https://www.googleapis.com/auth/admin.directory.user.readonly,https://www.googleapis.com/auth/admin.directory.customer.readonly,https://www.googleapis.com/auth/admin.directory.group.readonly
- OAuth Scopes:
-
-
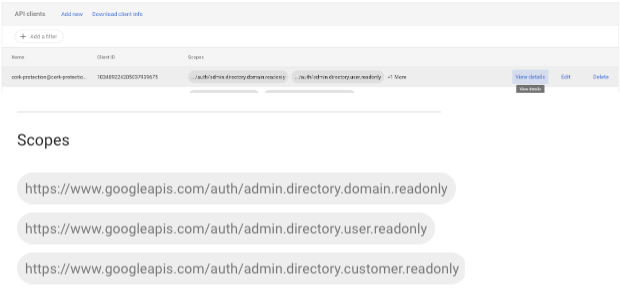
- Verification step, no action needed – In the API clients table, highlight the cork-protection row and select View details. Once the right side bar opens, verify that Client ID and scopes are correct.
Connecting Integration
- Log into Cork Protection in a new browser tab or window
- Navigate to the Integrations page
- Scroll down to the Email Provider section
- Locate Google Workspace and click Configure
- In step 17 of Generating an API key, you downloaded a private key file. Open this file in a text editor. Copy the entire contents of the seret key file to your clipboard. Paste the contents into the Private Key Contents field in Cork Protection.
- Enter a super administrator’s email address in the Admin Email field.
- (Optional) If desired, enter a display name for the integration
- Click the “Connect” button
